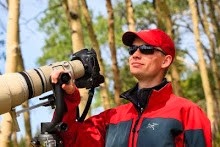
For my "sabbatical" trip I decided that it was time to revisit the American Southwest, and March seemed like the perfect time to do this first trip, with a digital camera. The other reason behind the trip in March, is that it allowed me to get plenty of great climbing in too, while snow and ice cover the rocks back in Montana.
Each parks name is linked to its corresponding gallery of photos and the thirty "best" images are in "The Best of My March Through the Southwest (2013)."
On March first I left Billings and drove well past Salt Lake City, where I stopped at a rest stop for a few hours sleep, before pushing on to Las Vegas. Actually I was to the west of Vegas, meeting friends for a week of climbing in Red Rock Canyon National Conservation Area. The climbing was amazing, and the photography was not to shabby wither. I ticked off my first 5.11 on-sight trad lead (Animal Boy 5.11d, or if you listen to Mountain Project it is 5.12a), I got to climb many of the famous climbs, and even climbed some of the remote, rarely climbed routes. Did I mention that I took some pictures too.
After Red Rock Canyon I went with friends to Zion National Park...Zion is beautiful, but without leaves on the trees it just does not seem right to take many pictures, but the climbing is good.
From Zion we made our way to the San Rafael Swell with a quick little stop in Capitol Reef National Park and Bryce Canyon National Park (I'll come back to Bryce). The "Swell" is amazing and worth a visit, or ten. The main plan was to get in some great canyoneering, and we did. We made our way to the middle of the "Swell" and did Baptist Draw and Upper Chute Canyon, if you are interested in technical canyoneering and find yourself in the area, I would call these a must do.
After the Swell, I left one group of friends to meet with another in Arches National Park, but they changed their plans and left me to Arches and Canyonlands National Park all by my lonesome. That was just fine though, I'm a nature photographer...that's how I work best, and with a new moon the planned night photography part of my trip was just getting started.
Arches and Canyonlands, especially Island in the Sky, are simply incredible. The parks are really a landscape photographers paradise, and if you plan a fall or spring trip the low sun angle makes for some different opportunities that will help you photos be different from the millions of summertime visitors.
I made my way South for some climbing in Indian Creek, and photography in the Needles district of Canyonlands National Park, and that continued my streak of awesome climbing and photography.
After leaving Canyonlands I made my way to Natural Bridges National Monument for one last night of star trail photography, and the clouds cooperated letting me have a great night to shoot Owachomo Bridge. I left Natural Bridges in the dark, so I could get down to Monument Valley Navajo Tribal Park for sunrise, and that worked out quite well. Although I had been up all night, and was getting tiered I decided to drive up to Antelope Canyon, so I could get into the upper canyon on a week day (praying for less crowds). Light shafts begin to make their way to the canyon floor again in mid March, and being able to visit in the "off season" with light shafts and on a week day meant that I was able to arrange a 2 hour (maximum time you can spend in the canyon) solo tour.
Antelope Canyon, like many of my destinations on this trip, has been shot by seemingly everyone, but I hope I was able to let my style keep my images from looking exactly like everyone else's.
From there I decided that I was ahead of schedule and could in fact try my luck at getting a Wave permit. I made my way back into Utah, past Glen Canyon National Recreation Area, and into The Grand Staircase Escalante-National Monument. Access to The Wave is limited to ten online permits (reservations earned months in advance) and ten lottery permits issued the day before. It took me three tries, but I got a permit and spent an entire day in and around The Wave (actually waves).
When you loose the lottery you need something to do that day, while you wait to try again the next day, so I shot many of the other local sites, including; The Toadstools, The Towers of Silence, Coral Pink Sand Dunes State Park and Moccasin Mountain Track Site.
After ticking The Wave off of my list, I decided to head back ti Zion National Park, to see if the leaves had come in yet. Unfortunately they were just starting to bud, and the rangers predicted another week before things really started to be green. With that bit of bad news I decided to head North a bit and give Bryce Canyon National Park a little bit more of my time.
Three weeks into my trip, and all of my major objectives crossed off of my list I decided to look at the weather and determine the safest break in snow storms to drive back to Montana, and it is a good thing I looked when I did, because the time to leave was right then...as it was I ended up driving just ahead of the storm that pounded Northern Utah, Idaho, and Western Montana for the next few days.
Once I hade made it through the mountains I did decide to make a short side trip down to Yellowstone National Park, but it would have been rude to be so close and not pay the park a visit.
Make the jump to go through the online gallery, I ask that you leave comments/criticism or at least give your favorites a thumbs up...Thanks!
If you have questions, ask. I published the camera information with each image and have added full keywords to share just about anything you would want to know about the images.
Happy shooting
Showing posts with label Photography. Show all posts
April 20, 2013
March 3, 2012
Canon 5D Mark III
Canon has a new full frame camera and it seems like a great cross between the 7D, 5D II and 1Dx.
I am excited for this camera and have one, with a grip on order...I can hardly wait for the end of March.
There seems to be a lot of disappointment out there with this camera though. I might be missing something, but what did we all want the 1Ds replacement to be? The 5DII was really just a 1DsIII light and when the 1Dx said it was the "New Flagship" that meant that the 1DsIII needed to be replaced.
My list for the 1DsIII replacement was:
I have a 5D III and grip on order, and will use it heavily. It is almost exactly what I have wanted for big mile days when I take only one camera and should be a slight improvement for my landscape photography (over the 1DsIII and 5DII, but they did not need much improvement).
I am sure Canon will eventually deliver a 30-50MP, slow, camera for those of you who want that, but I don't think that I would have bought the camera if it could only shoot 4fps in full quality 14-bit RAW, even at 50MP. When I need insane file size for landscapes I use my T/S lens' like a large format camera. I don't think I have ever had a client as for more resolution, ever. I also don't believe current lenses and diffraction limits of optics will make folks happy when they shoot a 45MP camera much past f/8.
For those that wanted "serious" video features, that is the C300 and whatever else they bring out below it in that line. I don't need to produce music videos, TV shows, feature films or even commercials. I am just looking for a high quality way to record footage while I am in the field to shoot stills.
I am happy with what Canon made for us who choose to purchase one, and I hope that those of you who are not happy will soon get a camera that will do what you need in the field.
Happy analyzing, but really you should get out and do some shooting ;)
- Canon Professional Network has some great info about the new camera.
- DP Review, as always, has some great information too.
- As does Rob Galbraith, but it is more of the same.
- Canon Rumors did a good job of keeping us all informed before the camera was official too.
- For those that wanted a new video camera with "pro" video features...this article does a good job expelling what you got instead.
I am excited for this camera and have one, with a grip on order...I can hardly wait for the end of March.
There seems to be a lot of disappointment out there with this camera though. I might be missing something, but what did we all want the 1Ds replacement to be? The 5DII was really just a 1DsIII light and when the 1Dx said it was the "New Flagship" that meant that the 1DsIII needed to be replaced.
My list for the 1DsIII replacement was:
- Drop the weight...check
- Get better AF...(assumably) check
- Get more AF coverage...check
- Get better/more high ISO shooting...check
- Get to 6+ fps...check
- Get to 6,000pix on the long end, but not much more...(close - 5760 x 3840)
- Shoot 1080P with usable features to replace tradition cameras...check (real audio/exposure control and legitimate timecode/monitoring)
- Get internal HDR and Timelapse...we got the HDR half of it
- Get a real GPS option...check (I have experienced the poor reception and battery life of built in versions)
- Get a better screen...check
- Dual multi-selectors...check (if you add the grip)
- Keep dual cards (After the D3x-1Dx I wanted it to stay CF and SD)...check
- Keep a good/consistent Battery...check (same as my 5DII and 7Ds)
- 5616 x 3744 TO 5760 x 3840 (I really did want to match the D3x at 6048 x 4032, but not much more)
- 100 - 1600 in 1/3 stops, plus 50, 3200 TO Auto, 100 - 25600 in 1/3 stops, plus 50, 51200, 102400
- Less than perfect 45p AF TO 61p AF (with spot AF :)
- 230,000 screen dots TO 1,040,000
- 5 fps TO 6 fps (the 1DsII was only 4fps and the 1Ds was only 3fps)
- Exposure compensation of ±3 EV TO ±5 EV
I have a 5D III and grip on order, and will use it heavily. It is almost exactly what I have wanted for big mile days when I take only one camera and should be a slight improvement for my landscape photography (over the 1DsIII and 5DII, but they did not need much improvement).
I am sure Canon will eventually deliver a 30-50MP, slow, camera for those of you who want that, but I don't think that I would have bought the camera if it could only shoot 4fps in full quality 14-bit RAW, even at 50MP. When I need insane file size for landscapes I use my T/S lens' like a large format camera. I don't think I have ever had a client as for more resolution, ever. I also don't believe current lenses and diffraction limits of optics will make folks happy when they shoot a 45MP camera much past f/8.
For those that wanted "serious" video features, that is the C300 and whatever else they bring out below it in that line. I don't need to produce music videos, TV shows, feature films or even commercials. I am just looking for a high quality way to record footage while I am in the field to shoot stills.
I am happy with what Canon made for us who choose to purchase one, and I hope that those of you who are not happy will soon get a camera that will do what you need in the field.
Happy analyzing, but really you should get out and do some shooting ;)
Labels:
1Ds III,
1Dx,
5D Mark II,
5D Mark III,
5D3,
5DIII,
Camera,
Canon,
Canon Professional Network,
Canon Rumors,
Dave Shumway,
DP Review,
Features,
Landscape,
Nature,
New,
Photography,
Rob Galbraith,
Video,
Wildlife
December 31, 2011
Best Images of 2011
Why does everyone do one of these year in review things? How can I go about choosing my top ten or twelve images from any given year?
Okay, fine, I'll try. I guess I make my students present 20 images at the end of each semester, so I'll do the same. There is no particular order to these selections, but I hope you enjoy the fruits of my "labor." I spent 52 days in Yellowstone National Park and another 70 days, or so, on other trips around North America.
All of the images can be clicked on to see a larger version within my site. I hope all of you have had a great holiday season, and are ready for a 2012 full of shooting.
Okay, fine, I'll try. I guess I make my students present 20 images at the end of each semester, so I'll do the same. There is no particular order to these selections, but I hope you enjoy the fruits of my "labor." I spent 52 days in Yellowstone National Park and another 70 days, or so, on other trips around North America.
All of the images can be clicked on to see a larger version within my site. I hope all of you have had a great holiday season, and are ready for a 2012 full of shooting.
Labels:
2011,
Best of,
Dave M. Shumway,
Dave Shumway,
December,
Fragile Places,
Images,
Nature,
Photo,
photographs,
Photography,
wild,
Wild Places,
Wildlife,
Year End,
Year in Review
November 26, 2011
Ask Dave, November 26
Ask Dave, November 26th
I get tons of questions each week, I respond as quickly as possible, and I might just answer them here too. If you have questions you can email me at <a href="mailto:Learn@DaveShumway.com">Learn@DaveShumway.com</a>.
Question:
Tony asked...
Why do you use an exposure bias?
Answer:
Often when working in rapidly changing light, with dynamic subjects, I (and many professional photographers) switch from manual to aperture priority mode (some will go to shutter priority mode, depending on the situation). When working with most modern cameras the photographer needs to be aware of what the camera is thinking when metering and suggesting an exposure for a scene, so they can step in and override the camera as needed.
On a basic level your camera wants everything that it meters to be 18% grey (see note). For most "normal" scenes that works well, but nature is full of black (100%) and white (0%). Think about a black bear or a tundra swan. A head shot of a black bear will tend to be overexposed as the camera thinks the black bear should be 18% grey. A similarly tight shot of a swan will be under exposed as the camera attempts to make the white swan 18% grey.
Some overcome this issue by using a middle/neutral grey exposure card (or something that is about 18% grey) with the camera's spot meter to dial/lock in a correct exposure for the scene. Others use high end light meters to know what the "true" setting should be, but neither of these methods work well in rapidly changing conditions with wild subjects. However I have and still use both of these methods in the studio.
Regardless of the shooting mode you should understand what your camera is trying to do, so you can override as needed, to get the correct exposure for the light at the moment your camera goes "click." This normally means taking countless photographs with your gear in many conditions, so that when the moment of truth comes you can set your camera correctly, with little to no thought.
Who cares, I shoot RAW?
That is a legitimate argument, but I strive to get my image as close to "perfect" at the moment of capture. Also adjusting exposure is a good way to increase the visibility of nose, and there are the situations where you miss by more than a stop (about what can be easily adjusted with a RAW file). There are also the times when over exposing a black bear could completely blows out the grass or snow in the background, or when shooting a landscape that missing the desired exposure dilutes the power of the color and most software has a difficult time recovering those lost elements.
NOTE:
If I recall, it was Ansel Adams that suggested 18% as middle/neutral grey and many followed suit. Ansel was speaking of reflected light not luminance, which happens to be what ANSI's standards are based on, they use a luminance of 12%. Oddly Sekonic uses a reflectance of 14% (they are the top handheld light meter manufacture). The difference between 12% and 18% grey is about 1/2 stop, but a luminance of 12% is typically going to measure a reflectance of 18%. I know it all seems a bit crazy, convoluted and pointless. If, like most, you use your camera in an evaluative metering mode that means the camera wants most of your scene to show a reflective light of around 18% grey (the last sentence is all that matters).
A few general exposure compensation tips to remember:
I get tons of questions each week, I respond as quickly as possible, and I might just answer them here too. If you have questions you can email me at <a href="mailto:Learn@DaveShumway.com">Learn@DaveShumway.com</a>.
Question:
Tony asked...
Why do you use an exposure bias?
Answer:
Often when working in rapidly changing light, with dynamic subjects, I (and many professional photographers) switch from manual to aperture priority mode (some will go to shutter priority mode, depending on the situation). When working with most modern cameras the photographer needs to be aware of what the camera is thinking when metering and suggesting an exposure for a scene, so they can step in and override the camera as needed.
On a basic level your camera wants everything that it meters to be 18% grey (see note). For most "normal" scenes that works well, but nature is full of black (100%) and white (0%). Think about a black bear or a tundra swan. A head shot of a black bear will tend to be overexposed as the camera thinks the black bear should be 18% grey. A similarly tight shot of a swan will be under exposed as the camera attempts to make the white swan 18% grey.
Some overcome this issue by using a middle/neutral grey exposure card (or something that is about 18% grey) with the camera's spot meter to dial/lock in a correct exposure for the scene. Others use high end light meters to know what the "true" setting should be, but neither of these methods work well in rapidly changing conditions with wild subjects. However I have and still use both of these methods in the studio.
Regardless of the shooting mode you should understand what your camera is trying to do, so you can override as needed, to get the correct exposure for the light at the moment your camera goes "click." This normally means taking countless photographs with your gear in many conditions, so that when the moment of truth comes you can set your camera correctly, with little to no thought.
Who cares, I shoot RAW?
That is a legitimate argument, but I strive to get my image as close to "perfect" at the moment of capture. Also adjusting exposure is a good way to increase the visibility of nose, and there are the situations where you miss by more than a stop (about what can be easily adjusted with a RAW file). There are also the times when over exposing a black bear could completely blows out the grass or snow in the background, or when shooting a landscape that missing the desired exposure dilutes the power of the color and most software has a difficult time recovering those lost elements.
NOTE:
If I recall, it was Ansel Adams that suggested 18% as middle/neutral grey and many followed suit. Ansel was speaking of reflected light not luminance, which happens to be what ANSI's standards are based on, they use a luminance of 12%. Oddly Sekonic uses a reflectance of 14% (they are the top handheld light meter manufacture). The difference between 12% and 18% grey is about 1/2 stop, but a luminance of 12% is typically going to measure a reflectance of 18%. I know it all seems a bit crazy, convoluted and pointless. If, like most, you use your camera in an evaluative metering mode that means the camera wants most of your scene to show a reflective light of around 18% grey (the last sentence is all that matters).
A few general exposure compensation tips to remember:
- Brightly lit snow is one and one-third to two stops brighter than medium/neutral gray;
- a bear or bison filling the frame is normally around one stop darker than medium/neutral gray;
- a white swan or pelican is normally around one stop brighter then medium/neutral gray;
- a raptor's dark underside against bright sky is normally around two to three stops too dark (your camera gets confused by the bright sky);
- dead grass of early spring and fall is very near white (0%) expose accordingly;
- When in doubt, check the histogram. Still in doubt, bracket. (heck always check the histogram)
Happy shooting
September 4, 2011
Ask Dave, September 4th
First off... Sorry that I took the month of August off, without warning. I was charged with launching the new website for Rocky Mountain College, and they had lots of issues thanks to a consultant and designers that did not understand the needs of the college. It all worked out okay, but I did end up spending a few weeks working 100+ hours each week. When you work 108 hours and there are only 168 hours in a week, well... you can do the math, but sleeping about 42 hours left me with less than 18 other hours to cook, eat, clean the house, do dishes, do laundry, attempt to stay in touch with friends/family and work my last few shifts at Best Buy. No time for blogging, I barley made time to make an end of the month trip to Yellowstone (I had no choice, I had to make a trip to keep my 5 year run going).
If you forgive me, keep reading :)
Ask Dave, September 3rd
I get tons of questions each week, I respond as quickly as possible, and I might just answer them here too. If you have questions you can email me at Learn@DaveShumway.com.
Question:
From... Colleen
I will be visiting Yellowstone in September and have been addicted to your photo galleries. Beside the tourist areas in Yellowstone, are there any areas that you love to photograph at? Any advice you can give a novice photographer?
Answer:
September is a great time in YNP, but much will depend on weather. Some years early September is cool, and the shooting is spectacular all around the park. Other years it is hot into September/October and then the shooting can be much like summer, best at sunrise and sunset, then very slow all day.
My advice would be:
Use Av (aperture priority) mode if you can, make sure that you are checking your screen/histogram, bring all the telephoto power you can, download and inspect your photographs each night/day and enjoy your time out taking pictures in paradise.
I'll be making a trip in a few days, and will try to post to my blog/site/etc quickly after I return, but another great way to keep track of what is happening is to follow me on Twitter/Facebook/Google+, as I post my day by day while on trips (and share some updates that I receive from friends too).
The general nature photography tips still hold true:
If you forgive me, keep reading :)
Ask Dave, September 3rd
I get tons of questions each week, I respond as quickly as possible, and I might just answer them here too. If you have questions you can email me at Learn@DaveShumway.com.
Question:
From... Colleen
I will be visiting Yellowstone in September and have been addicted to your photo galleries. Beside the tourist areas in Yellowstone, are there any areas that you love to photograph at? Any advice you can give a novice photographer?
Answer:
September is a great time in YNP, but much will depend on weather. Some years early September is cool, and the shooting is spectacular all around the park. Other years it is hot into September/October and then the shooting can be much like summer, best at sunrise and sunset, then very slow all day.
My advice would be:
- To spend time at higher elevations if you are looking to see and photograph bears;
- To head to the Tetons mid September - early October if you seek moose;
- To spend time around Canyon and Madison if elk are the object of your desire;
- To search for great grey owls around Canyon;
- To spend time around Canon/Hayden and Lamar if wolves are what you seek.
Use Av (aperture priority) mode if you can, make sure that you are checking your screen/histogram, bring all the telephoto power you can, download and inspect your photographs each night/day and enjoy your time out taking pictures in paradise.
I'll be making a trip in a few days, and will try to post to my blog/site/etc quickly after I return, but another great way to keep track of what is happening is to follow me on Twitter/Facebook/Google+, as I post my day by day while on trips (and share some updates that I receive from friends too).
The general nature photography tips still hold true:
- You can't photograph it if you don't see it (so get up early and stay out late);
- Bad weather makes for good light;
- Change in weather stirs animals behaviors;
- If you don't have a camera with and set you cannot capture an image.
Labels:
Ask Dave,
Bears,
Beartooth,
Change,
Color,
Dave Shumway,
Elk,
Fall,
Great Grey Owls,
Leaves,
Moose,
Ox-Bow Bend,
Photography,
September,
Tips,
Wolves,
Yellowstone National Park,
YNP
July 25, 2011
Two Months...
Last year I spent the entire month of July photographing, bike touring, and backpacking the Northern Rockies from Glacier National Park through Jasper National Park, and it was amazing. I had planned to do it again this year from July 14th - August 14th, but delays at work forced me to cancel my trip. Most of you know that I am the staff photographer and also the web content manager for Rocky Mountain College in Billings, Montana; RMC is launching a new website and delays on the part of our design company and navigation consultant pushed us back by a few months, and my vacation was left to suffer. I needed to take a month off (150 hours) because we have a cap, but as I have been forced to abandon vacation I get to take it next year. Next year I'll have another four weeks that I "must" take, so that is two months of vacation and I really only have from the middle of June through the middle of August to use take the time off (this is two months paid vacation and after using two months I'll still have one month left over).
I know what you are thinking; "rub it in Dave... your life is so amazing..."
I am living the dream, or darn near it, but I do have a problem I can't decide what to do or where to go. The reason for this blog post is that I need your help deciding.
Let me start with some ground rules:
Thanks
p.s. Remember I am heading to Churchill to photograph Polar Bears in October this year, so...
p.s.s. Readers who are clients and editors... if you have some special place you need/want shot, let me know. I have already chatted with some of you about projects for next year, but if you come up with any others suggest away.
I know what you are thinking; "rub it in Dave... your life is so amazing..."
I am living the dream, or darn near it, but I do have a problem I can't decide what to do or where to go. The reason for this blog post is that I need your help deciding.
Let me start with some ground rules:
- Photography is king (Nature and Wildlife);
- Adventure is important;
- I do not like hot weather;
- I want to camp;
- I want my trips to be planned at the ideal time for my intended subject;
- I do not speak spanish;
- I need to keep costs relatively low, the next twelve months will be very expensive in terms of gear to buy (darn Canon's new super telephoto lenses and the new cameras that are coming out).
- June 15th - July 7th camping on the coast of Katmai National Park followed by July 8th - July 15th camping in Brooks Camp;
- Repeat my trip to the Canadian Rockies from July 15th - August 15th;
- Find a girlfriend, who speaks Spanish (Chilean Spanish), and wants to spend two months backpacking in Torres del Paine National Park while acting as my translator (winter time);
- Drive the Dempster and/or Dalton highways for a month of birding (spring nesting season);
- Explore the Pacific Northwest and BC to see what I can find;
- Sit at home and edit my insane backlog of video and time lapse footage (that will be even worse by then);
- I wish I could take the end of August through September off and spend a month shoot fall from Denali through the Dalton Highway; but teaching/sports photography interferes with that plan.
Thanks
p.s. Remember I am heading to Churchill to photograph Polar Bears in October this year, so...
p.s.s. Readers who are clients and editors... if you have some special place you need/want shot, let me know. I have already chatted with some of you about projects for next year, but if you come up with any others suggest away.
Labels:
2011,
2012,
August,
Dave Shumway,
July,
June,
Photography,
Summer,
Trips,
Two Months
July 23, 2011
Ask Dave, July 23rd - Photography Websites
Ask Dave, July 23rd
I get tons of questions each week, I respond as quickly as possible, and I might just answer them here too. If you have questions you can email me at Learn@DaveShumway.com.
Question:
From... Rob
I want to make a photo website; but the options confuse me. Do you have any suggestions?
Answer:
Typically I suggest that folks pay someone like SmugMug/LiveBooks/PhotoShelter to host their site and to help provide the technical end of the site. This takes most of the technical aspects out of making a photo site. If you go this route all you will need to do on the side is to find a domain registrar and choose the perfect domain name for you.
I'll address the three companies I have experience with and really the three best options available for photographers today.
I think that LiveBooks offers the best (most SEO friendly) portfolio site available (I love mine, and they do a great job).
SmugMug is the most affordable, and easiest to use option; but they have their limits, and they don't do a good job of handling stock image sales. (Their SEO is okay). They host unlimited images/videos for a very fair rate, and that is why I use them to host all of my trip images. Get their "Pro" account. (http://FragilePlaces.com)
I think the best all in one solution is PhotoShelter, and I am working with them to build my new stock sales site. The problem is that they are expensive, as you are forced to pay (big bucks) for data storage. They have solid SEO; but their "portfolio" / "blogs" are only okay compared to LiveBooks.
Whenever I finish my new stock site I will be using each of those companies for what they do best; but I don't really suggest that for most folks. (Choose the one that does what you really need/want)
If you don't plan to have a ton of images and want to print/ship yourself I think LiveBooks is your best bet.
If you want lots of images at a great rate, and are happy with the long list of services that SmugMug offers I think they are a great option.
If money is no object and you want lots of images with solid SEO and lots of printing options; but you don't mind if you sacrifice a bit on your portfolio then PhotoShelter is the way to go.
If you go the SmugMug route use this link to save both of us a bit ($5 I think):
https://secure.smugmug.com/signup.mg?Coupon=r9qtUffwT7wUY
I really like the look of what PhotoShelter is doing for a one stop solution; but they cost more if you have lots of images:
http://www.photoshelter.com/
LiveBooks sites are beautiful and have SEO dialed to perfection:
http://www.livebooks.com/
And I really like their mobile sites.
SEO = Search Engine Optimization, and it is a big deal.
I get tons of questions each week, I respond as quickly as possible, and I might just answer them here too. If you have questions you can email me at Learn@DaveShumway.com.
Question:
From... Rob
I want to make a photo website; but the options confuse me. Do you have any suggestions?
Answer:
Typically I suggest that folks pay someone like SmugMug/LiveBooks/PhotoShelter to host their site and to help provide the technical end of the site. This takes most of the technical aspects out of making a photo site. If you go this route all you will need to do on the side is to find a domain registrar and choose the perfect domain name for you.
I'll address the three companies I have experience with and really the three best options available for photographers today.
I think that LiveBooks offers the best (most SEO friendly) portfolio site available (I love mine, and they do a great job).
SmugMug is the most affordable, and easiest to use option; but they have their limits, and they don't do a good job of handling stock image sales. (Their SEO is okay). They host unlimited images/videos for a very fair rate, and that is why I use them to host all of my trip images. Get their "Pro" account. (http://FragilePlaces.com)
I think the best all in one solution is PhotoShelter, and I am working with them to build my new stock sales site. The problem is that they are expensive, as you are forced to pay (big bucks) for data storage. They have solid SEO; but their "portfolio" / "blogs" are only okay compared to LiveBooks.
Whenever I finish my new stock site I will be using each of those companies for what they do best; but I don't really suggest that for most folks. (Choose the one that does what you really need/want)
If you don't plan to have a ton of images and want to print/ship yourself I think LiveBooks is your best bet.
If you want lots of images at a great rate, and are happy with the long list of services that SmugMug offers I think they are a great option.
If money is no object and you want lots of images with solid SEO and lots of printing options; but you don't mind if you sacrifice a bit on your portfolio then PhotoShelter is the way to go.
If you go the SmugMug route use this link to save both of us a bit ($5 I think):
https://secure.smugmug.com/signup.mg?Coupon=r9qtUffwT7wUY
I really like the look of what PhotoShelter is doing for a one stop solution; but they cost more if you have lots of images:
http://www.photoshelter.com/
LiveBooks sites are beautiful and have SEO dialed to perfection:
http://www.livebooks.com/
And I really like their mobile sites.
SEO = Search Engine Optimization, and it is a big deal.
Labels:
2011,
Ask Dave,
Dave Shumway,
July,
LiveBooks,
Photography,
PhotoShelter,
Search Engine Optimization,
SEO,
SmugMug,
Website
May 15, 2011
Yellowstone May 9th - 13th
A sow Grizzly Bear uses a log bridge to cross over the water on a warm May morning near Grizzly Lake trailhead in Yellowstone National Park. Captured with a Canon 7D with 500/4.0L IS in aperture priority mode with an exposure bias of +1/3 at ISO200, f/7.1, and 1/400th of a second. The camera was mounted on a Gitzo 3540XLS and Induro GHB2 gimbal head with custom long lens support.
PHOTOS & VIDEO NOW ONLINE
For those of you who follow along with my trips on Facebook and Twitter you know all of this, and even got to see some of it live (thanks to my Verizon iPhone). If you are the kind of person who would enjoy the play by play during my trips you should follow me on one of those social networks.
The spring semester at Rocky Mountain College is over, graduation has come and gone, and I managed to get all of the photos edited and online before Monday (my birthday). What does all of that mean? I was free to head to the park for the entire week. I left Billings before 4am on Monday morning and was inside the park just minutes after sunrise, well the time the sun rose, I could not see the sun as Monday and Tuesday were days filled with rain and snow. On the bright side, actually very cloudy side, the rain made for goos shooting light all day long. Unfortunately things in the park were hit or miss, and I seemed to be missing everything by a minute or two.
With luck not going my way I decided that I should make my own luck, and I spent the next few days focusing on birds, and I came home with over a thousand images of birds to edit. The park is filled with its spring/summer birds and they are in their finest plumage, making them spectacular to photograph. Generally I suggest photographing birds in the mid day when the light is far too harsh to photograph almost everything else in the park, and that is what I did (even on the cloudy/rainy days). Mountain Bluebirds, American Kestrel, Eared Grebe, and Harlequin Ducks spent the most time in front of my lens; but a Hairy Woodpecker, Common Merganser, Red-tailed Hawk, and Golden Eagle ended up making the cut too. Lots of other birds back in the park; but I found that many of the others were not in the most pleasing of environments to make images.
If you want to photograph the Harlequin Ducks head to LeHardy Rapids south of the Hayden Valley. There is lots of snow over the walkway, and the park service might close the area soon (for your safety): but in the meantime the birds are in close, and the rapids are running at a very pleasing pace. Take your longest lens and if you have a polarizer for it try to use it, a low ISO, and a narrow aperture to make some long exposure photographs of the birds when they are sitting still (1/2 - 1/15th of a second should work well). You will need a tripod, cable release, and cooperative birds; but if it all comes together you can make some nice images of the birds in the rapids with the water "blurring" by them. I would encourage you to also try some faster shots of the ducks as they fly back up the rapids. For the "flight" shots you will need a shutter speed of 1/800th (ish) or faster to stop the birds motion. You will also need to have your camera in continual (predictive) auto focus mode (AI SERVO in Canon AF-C for most other brands). Have fun and let your creativity run wild as the light/water/birds do what they will to present you with unique opportunities for images.
The Lamar Canyon Wolves were all around and making the occasional road crossing, and for those that were fortunate enough to be at the right place at the right time I am sure they presented the opportunity for nice images, I was not fortunate this trip to catch a crossing; but I did see them numerous times over the five days.
The Lamar Valley and the area around Specimen Ridge has more bears around than I have ever seen in that area in the past. I was seeing 3-6 bears in the area each day, and at times up to three bear in an area at once, and then down the road a sow with her 2/3 year old cub feeding on the hillside. For those, like me, trying to photograph bears the area did not provide ample opportunities to photograph the Grizzly Bears at a pleasing distance. Other than the occasional crossing, normally happened very quickly, the bears were too far away to make pleasing images, especially later in the week when the blue sky and harsh midday sunlight created situations with high atmospheric distortion robbing images of their clarity/sharpness.
The Tower Junction area has always been "the place" for seeing and photographing Black Bears inside of Yellowstone, and this year is no exception; but the road to Tower Fall is still not open, so most folks choose not to explore the area. As I reported from my last trip the road had a number of "big" slides come down between Calcite Springs Overlook and Tower Fall. The Park Services cleared those slides and repaired the road; but the rain from Sunday/Monday/Tuesday caused more slides to come through and the road was not able to be opened on Friday as planned. I and a few others chose to hike the road and many of us were rewarded with the chance to photograph a few different Black Bear in the area, I also spent some time at Rainy Lake photographing an Eared Grebe in the green waters of the lake.
Wednesday morning promised a break in the storms sometime in the morning, so I was out early with high hopes that the breaking storm might provide a dramatic sunrise, and it delivered. The ponds the fill the area north of Specimen Ridge make for great reflecting pools of the Absoraka Mountains to the Northeast, and the sun also rises from behind those very same mountains. As I ran around trying to find that perfect spot to capture the sunrise car after car drove right by on their quest to see bears and wolves in the Lamar Valley... their loss. If there is a chance of a break before or after a storm, and you have any desire to create landscape images, make sure that you go out to see what kind of magical light you might be able to find.
With May comes more visitors to the park, and early May tends to bring out the "usual" crowd of photographer, and most of us have become friends over the years, so breaks between shooting have a tendency to get filled with lots of great conversations. Occasionally those conversations will yield information that leads us to our next subject to photograph. I was lead to the Madison Campground with the promise of pine martin. I knew that a pine martin had been feed by guides in one of the warming huts over the long snowy winter; but I had assumed it would have left the area when those that were (illegally and inappropriately) feeding it quit. With reports of "recent" sighting I spent an evening and a morning in the area with the hope of getting lucky enough to cross the Pine Martin off of my list of subject that I still need to photograph in the park. I had no luck, and all the first had reports I could track down had the pine matins out the area a weak before. Oh well, some other time.
Where does the bear photograph that is at the top of this report come in? Hold your horses... I am getting there. A few days in a row a bear had been putting on a show near the road, and even crossing a few times each day. Most of the "regular" visitors believe that the bear is a 5/6 year old sow know as the Porcupine Grizzly. She got the name after she spent a number of days in view with a number of porcupine quills in her, not last year; but the year before. From the markings on the bear most of us are "sure" that it is her, sadly many of us expected that she would have cubs this year; but she did not. The first two days I only spent a small amount of time with the sow, as her surrounding were less than ideal and the light was down right bad; but on the third day things looked more promising. I spent probably 5 hours with her, and plenty of other park visitors, as she put on a clinic on how to dig out ground squirrels. During the process she worked around in good light and scenes, and near the end of here public show she crossed the water on a log bridge, and gave me the opportunity for the above image. It was myself and four friends who were still around to see her use the "bridge."
My next trip will come soon; but never soon enough. If I had not had a pair of presentations to make in Billings for the Photographic Institute of the Yellowstone's annual EXPO on Saturday I would still be in the park; but maybe I'll even be able to slip away as soon as this weekend.
Make the jump to go through the online gallery, I ask that you leave comments/criticism or at least give your favorites a thumbs up... THANKS!
If you have questions, ask... I published the camera information with each image and have added full keywords to share just about anything you would want to know about the images.
Happy shooting
p.s. I have some video footage that still needs editing, it will take me a while to find time to edit it. (Honestly I need an editor/friend who wants an editing project to go to town with two plus years of 1080P video footage from YNP)
Labels:
2011,
Grizzly Bear,
May,
natural,
Nature,
Photography,
Spring,
wild,
Wyoming,
Yellowstone National Park
May 6, 2011
Yellowstone April 30th - May 2nd
A female Three-toed Woodpecker does what woodpeckers do just before sunset in the Roosevelt Junction area on the last day of April. I had the privlage of spending a few hours with him while he consumed all of the green grass that he could find. Captured with a Canon 7D with 500/4.0L IS in aperture priority mode set to +2/3 at ISO400, f/4.0, and 1/200th of a second. The camera was mounted on a Gitzo 3540XLS and Induro GHB2 gimbal head with custom long lens support.
PHOTOS & VIDEO NOW ONLINE
For those of you who follow along with my trips on Facebook and Twitter you know all of this, and even got to see some of it live (thanks to my Verizon iPhone).
I love to make a trip in the first few days of May. It is typically a reunion of many of my "Yellowstone Friends." There is a good group of "regulars" who always find their way to the park by the start of May, and we have a few weeks where it seems that the park is still not crowded; but full of friends. The activity levels are not at their summer high; but still provide ample good shooting, and chances for "luck" to show its face. When that fails we can fill the hours with great conversations about gear, other trips, and the blessings of years past. It really is a great time in Yellowstone.
This year it was colder and there was much more snow than years past; but we all know how to put a hat and gloves on and make-due.
I feel a little bad about how picky I am starting to get. I had a few different chances to photograph Grizzly Bears; but did not take a single shot. I had my excuses... too much atmospheric distortion, too sunny, etc. (I had the same issue with Wolves; but they were a bit too far for my liking, and I did not get lucky enough to get a road crossing).
I camped in the park once again and each night it got down into the high teens or twenties; but during the days it got into the 40s/50s/61. On the trip Mother Nature gave us wind, rain, snow, and clear blue sky.
For those that do not know... there is still lots of snow, and it keeps snowing more; but spring and summer will happen eventually. Things are ready to green up, and for most of us photographers it cannot happen soon enough.
The image descriptions tell the story fairly well; but I'll add a few details: (p.s. I added images discription to about a dozen images in the gallery)
- I was photographing a few Sage Thrashers when an American Badger popped out and put on a little show, the sun and atmospheric conditions made the distortion bad (even at 50 meters).
- I found another badger while I was looking for the Lamar Canyon Pack; but unfortunately the den is in a "Wolf Management Area."
- I spent lots of time photographing birds, sorry if you don't like them, I enjoy the images and really enjoy the time spent photographing birds.
- I made the mostly snow covered walk up to Tower Fall (I have put a "S" on its name for far too long). There are lots of fallen rocks on the road and two fairly major slides (one is pictured below). I will be surprised if the park is able to get the road open on time, as it appears that the road was actually damaged by the slides.
- While hopping to catch Wolves coming back to the "China Garden" kill I was fortunate to get lots of Osprey in flight shots.
- Two Wolves did come in to the carcass about 2 hours after sunset, I was on my way to get gas and stopped to watch (it was DARK).
- Birds of all kinds are back in the park, and the Great Horned Owl, appears to be on her usual "Mammoth" nest. (I'll share this nest and the "Tower Fall" Osprey nest, because they are beyond common knowledge already).
- I filled each day with great conversations with friends.
Monday I am back to the park for a while again, so hopefully I'll have more images to share from May in Yellowstone.
Make the jump to go through the online gallery, I ask that you leave comments/criticism or at least give your favorites a thumbs up... THANKS!
If you have questions, ask... I published the camera information with each image and have added full keywords to share just about anything you would want to know about the images.
Happy shooting, MAY IS HERE :)
p.s. I have some video footage that still needs editing, it might take me a while to find time to edit it though
Labels:
2011,
April,
May,
natural,
Nature,
Photography,
Spring,
wild,
Wyoming,
Yellowstone National Park
April 27, 2011
Sage-Grouse Lek, April 23rd & 24th
Created from 584 images each image shot with a Canon 5DII and 17-40/4.0L set manually to f/4.0, ISO1600, and 30 seconds. The RAW files were processed in Lightroom 3 then using action scripts they were stacked together in Photoshop CS5 to make this final image.
PHOTOS NOW ONLINE
I made the trip down to shoot these star trails and time lapses; but really so that the next morning I could photograph displaying Sage-Grouse on a massive Lek on some remote BLM land.
It was calm with perfectly clear sky. The half moon rose during the night and was straight overhead around sunrise, creating good condition (as far as solar/lunar phases go).
Before this trip I took time to record my answer to this weeks 'Ask Dave' and that blog post and video can be found here.
To the left: A male Sage-Grouse displays on a remote Lek near the MT/WY boarder. Captured with a Canon 7D and 500/4.0L IS + 1.4TC III set in aperture priority mode with an exposure bias of +2/3 at f/7.1, ISO400, and 1/640th of a second. Mounted on a Gitzo 3540XLS and Induro GHB2 with custom long lens support. Photographed from within a ground blind.
My main point for shooting the star trails and time lapses was to test out some software and action scripts. YOU WANT TO CHECK OUT THIS VIDEO
Two male Sage-Grouse fight on a remote Lek near the MT/WY boarder. Captured with a Canon 7D and 500/4.0L IS + 1.4TC III set in aperture priority mode with an exposure bias of +2/3 at f/7.1, ISO400, and 1/320th of a second. Mounted on a Gitzo 3540XLS and Induro GHB2 with custom long lens support. Photographed from within a ground blind.
Labels:
2011,
April,
Birds,
BLM,
Dave Shumway,
HD Video,
Lek,
Montana,
Photography,
photos,
Sage Grouse,
Spring,
Star Trails,
Time Lapse,
Wyoming
Ask Dave, April 27th - Packing for a Lek
Ask Dave, April 27th
'Ask Dave' week eleven… I get tons of questions each week, I respond as quickly as possible, and this is week number eleven of answering them here too. If you have questions you can email me at Learn@DaveShumway.com.
Question:
From Erik...
How do you pack (what do you take along) for a normal day of shooting?
Answer:
I don't know if you would call star trails, time lapses, and a Sage-Grouse Lek "normal;" but I made a little video before heading out for a night and morning shoot on some remote BLM land.
HERE IS THE VIDEO
Enjoy
I also had three tripods along for the ride:
'Ask Dave' week eleven… I get tons of questions each week, I respond as quickly as possible, and this is week number eleven of answering them here too. If you have questions you can email me at Learn@DaveShumway.com.
Question:
From Erik...
How do you pack (what do you take along) for a normal day of shooting?
Answer:
I don't know if you would call star trails, time lapses, and a Sage-Grouse Lek "normal;" but I made a little video before heading out for a night and morning shoot on some remote BLM land.
HERE IS THE VIDEO
Enjoy
I also had three tripods along for the ride:
- Gitzo 3540XLS with an Induro GHB2 full gimbal head (with custom long lens support). This was used for the Canon 7D and 500/4.0L IS
- Induro CT214 with an Acratech GP ball head. This was used for the Canon 5DII and 17-40/4.0L for time lapse/star trails and then with the 70-200/2.8L IS while photographing from my blind at the Lek.
- Induro A413 with an Arca-Swiss Z1sp ball head. This was used for the Canon 20D and 28-135IS for time lapse/star trails.
Labels:
2011,
Ask Dave,
BLM,
Dave M. Shumway,
Dave Shumway,
Gear,
Gura Gear,
Kiboku,
Lek,
Overnight,
Packing,
Photography,
Sage Grouse,
Star Trails,
Trip,
Video
April 21, 2011
Ask Dave, April 21st - Churchill 2011
Ask Dave, April 21st
'Ask Dave' week ten… I get tons of questions each week, I respond as quickly as possible, and this is week number ten of answering them here too. If you have questions you can email me at Learn@DaveShumway.com.
Question:
From Pete...
Can I go with you to Churchill in the fall?
Answer:
YES you can...
I am going to Churchill with Dr. Jim Halfpenny, Professor Kayhan Ostovar, and some college students in October of 2011 to photograph Polar Bears, Snowy Owls, Arctic Fox, and more. *
I am not leading the trip, I am not being paid to go, I am actually paying to attend and paying to earn college credit on the trip (you never know when having a few extra Environmental Science credits will come in handy). The cool thing is that you can all go too.
There are thirteen spots total and a handful left open for auditors.
All of the details are on the RMC site:
http://rocky.edu/academics/programs/environmental/Churchill.shtml
Here are some of the key details:
October 12th - 18th, 2011
We will spend 4 days on the tundra, in vans, not the big, crowded, buggies.
We live at the research center, studying and photographing bears each day with lectures each evening.
Cost for RMC students is $2980
Cost for auditors is $3400 (this includes a private room en-route to Winnipeg)**
Initial deposit of $500 due April 30th. (I know that is coming soon)
Final payment due August 1st.
Travel insurance is required and can be purchased from Rocky for $13.50 (this is not trip cancellation insurance).
* (Hopefully all of them each day; but RMC and Dr. Jim Halfpenny would like to stress that polar bears are never a guarantee :)
** Auditors must also pay the standard course audit fee of $105, or $62 if you are over 60 years old.
As the RMC site says:
"RMC staff photographer and instructor of photography, Dave Shumway, will be joining the trip as a member of the class, so there will be chances for some photography instruction (when the teacher in him outshines the photographer in him)."
I really like the Naturescapes.net article about Churchill trips.
'Ask Dave' week ten… I get tons of questions each week, I respond as quickly as possible, and this is week number ten of answering them here too. If you have questions you can email me at Learn@DaveShumway.com.
Question:
From Pete...
Can I go with you to Churchill in the fall?
Answer:
YES you can...
I am going to Churchill with Dr. Jim Halfpenny, Professor Kayhan Ostovar, and some college students in October of 2011 to photograph Polar Bears, Snowy Owls, Arctic Fox, and more. *
I am not leading the trip, I am not being paid to go, I am actually paying to attend and paying to earn college credit on the trip (you never know when having a few extra Environmental Science credits will come in handy). The cool thing is that you can all go too.
There are thirteen spots total and a handful left open for auditors.
All of the details are on the RMC site:
http://rocky.edu/academics/programs/environmental/Churchill.shtml
Here are some of the key details:
October 12th - 18th, 2011
We will spend 4 days on the tundra, in vans, not the big, crowded, buggies.
We live at the research center, studying and photographing bears each day with lectures each evening.
Cost for RMC students is $2980
Cost for auditors is $3400 (this includes a private room en-route to Winnipeg)**
Initial deposit of $500 due April 30th. (I know that is coming soon)
Final payment due August 1st.
Travel insurance is required and can be purchased from Rocky for $13.50 (this is not trip cancellation insurance).
* (Hopefully all of them each day; but RMC and Dr. Jim Halfpenny would like to stress that polar bears are never a guarantee :)
** Auditors must also pay the standard course audit fee of $105, or $62 if you are over 60 years old.
As the RMC site says:
"RMC staff photographer and instructor of photography, Dave Shumway, will be joining the trip as a member of the class, so there will be chances for some photography instruction (when the teacher in him outshines the photographer in him)."
I really like the Naturescapes.net article about Churchill trips.
Labels:
2011,
Ask Dave,
Bears,
Churchill,
Dave M. Shumway,
Dave Shumway,
Fall,
October,
Photography,
Polar,
RMC,
Rocky Mountain College
April 13, 2011
Ask Dave, April 13th - Lightroom Key Commands
Ask Dave, April 13th
'Ask Dave' week nine… I get tons of questions each week, I respond as quickly as possible, and this is week number nine of answering them here too. If you have questions you can email me at Learn@DaveShumway.com.
Question:
From John...
What are the Adobe Photoshop Lightroom 3 key commands, and what ones do you actually use?
Answer:
Every Lightroom 3 key command is availible online here.
What ones do I use... not as many as I should.
Remember the commands I list here are for Mac OS, if you use a Windows box (you should buy a Mac), or know that; "Command" is "Control" and "Option" is "Alt."
Here they are, in no particular order:
Oh I love to hold "Option" while adjusting my sharpening (do it and you will know why).
This post has caused me to order a keyboard cover with all of the LR3 keyboard shortcuts/commands on it. (Thanks B&H)
'Ask Dave' week nine… I get tons of questions each week, I respond as quickly as possible, and this is week number nine of answering them here too. If you have questions you can email me at Learn@DaveShumway.com.
Question:
From John...
What are the Adobe Photoshop Lightroom 3 key commands, and what ones do you actually use?
Answer:
Every Lightroom 3 key command is availible online here.
What ones do I use... not as many as I should.
Remember the commands I list here are for Mac OS, if you use a Windows box (you should buy a Mac), or know that; "Command" is "Control" and "Option" is "Alt."
Here they are, in no particular order:
- Convert to grayscale - "V"
- Edit in Photoshop - "Command + E
- Paste settings from previous photo - "Command + Option + V"
- Reset a slider - "Double-click slider name"
- Toggle between Loupe and 1:1 Zoom preview - "Spacebar or Z"
- Undo - "Command + Z"
- Redo - "Command + Shift + Z"
- Convert to grayscale - "V"
- Increase/decrease brush size - "[ / ]"
- Increase/decrease brush feathering - "Shift + ] / Shift + ["
- Remove selected photo(s) from catalog - "Option + Delete"
- Go to next/previous photo in the Filmstrip - "Right Arrow/Left Arrow"
- Set star rating - "1 - 5" (Add "Shift" to go to next photo)
- Remove star rating - "0" (Add "Shift" to go to next photo)
- Assign a red label - "6" (Add "Shift" to go to next photo)
- Assign a yellow label - "7" (Add "Shift" to go to next photo)
- Assign a green label - "8" (Add "Shift" to go to next photo)
- Assign a blue label - "9" (Add "Shift" to go to next photo)
- Add keywords - "Command + K"
- Edit keywords - "Command + Shift + K"
- Check spelling - "Command + ;"
Oh I love to hold "Option" while adjusting my sharpening (do it and you will know why).
This post has caused me to order a keyboard cover with all of the LR3 keyboard shortcuts/commands on it. (Thanks B&H)
Labels:
Adobe,
Apple,
Ask Dave,
Commands,
Dave Shumway,
DaveShumway.com,
How to,
Key,
Keyboard,
Lightroom,
LR3,
Mac,
Photography,
Photoshop,
Shortcuts
April 3, 2011
Ask Dave, April 3rd - Star Trails
'Ask Dave' week eight… I get tons of questions each week, I respond as quickly as possible, and this is week number eight of answering them here too. If you have questions you can email me at Learn@DaveShumway.com.
Question:
From too many folks to name...
How do you photograph star trails?
SORRY IN ADVANCE FOR ALL OF THE 'VOICE' CHANGES.
Answer:
How to photograph star trails...
First you need a clear night in a place where you can see stars; but I assume you knew that ;)
Typically I suggest using lunar charts to shoot around a new moon, and or when the moon will be underfoot at night (set before you start and rise after you finish). It is dark enough about one to two hours after sunset and before sunrise; but there is often lots of air traffic until 11pm, so if you are near flight routes you might want to wait until after 11pm. (most agree that 1:00a-4:30a has virtually no air traffic)
Two ways to think about composing the star trails in your shot are:
- To place Polaris (the North star) in your frame, where all of the other stars with appear to circle around it (assuming you are in the northern hemisphere). I normally place Polaris in my shot when shooting wide angle shots.
- To keep Polaris (the North star) out of your frame, this will create arcs, and not complete circles. Any composition facing north will yield arcs in the northern hemisphere. Typically I do not shoot south in the northern hemisphere because the "arcs" become more like straight lines and are not very nice. When shooting more telephoto shots I avoid placing Polaris in the frame, and use the "arcs" in my composition. (When I say; "North"/"South" I mean north/south of a theoretical line between East and West.)
Some other star notes:
- Stars move about 15° each hour, so if you can expose for 6 hours you would have stars going 1/4 of the way around Polaris (6 hours is hard to do in summer months, and batteries die too quickly in winter months to get a 6 hour exposure and a 6 hour noise reduction exposure).
- The higher your elevation the more stars you are likely to see.
- The best star viewing is 25-150 miles away from towns/cites (the more people the further you should be).
- The weather needs to allow views of the stars for the entire expose, if clouds break your view you will have breaks in the trails, also clouds tend to be collectors of light pollution. (if clouds break up your exposure it could look like this)
- Avoid moon light, as it will cut your maximum exposure time dramatically. A 1/4 moon opposite your field of view will limit you to about a 30min exposure before the land looks like it is sunlit.
- You will be forced to use "B" aka. "Bulb" mode.
- RAW is the only way to go.
- The further away from town (light pollution) the better the star trails will look. (typically)
- Looking away from town (light pollution) is normally a good idea.
- Remove camera straps and anything else that will blow in the wind.
- Turn off your cameras/lens' image stabilization.
- Normally it is a great idea to turn on your cameras long exposure noise reduction.
- Shooting lenses wide open can show more vignetting and other aberrations.
- It is easier to start experimenting with wider angle lenses 17-35mm.
Things you need/should have:
- A tripod and remote shutter release are required.
- The remote must be lockable or an Intervalometer
- Intervalometer remotes can be pre programed allowing you to sleep in peace without worry about sleeping through the alarm to tell you to release your locking remote. (a computer or similar device can also work as an Intervalometer).
- A bubble level will make your life much easier.
- Live view on your camera will help you get the focus set properly.
- Mirror lockup is not a must. (with exposures this long it really does not matter)
- A headlamp, hat, gloves, warm boots/coat/pants, snacks, basically all the things you need to spend time outside in the "cold" night.
- I am assuming you have a camera and lens that you can control, and know how to use. If you do not know how to use your camera in the warm, well light, indoors, then you will not be able to use it in the cold, dark, outdoors.
- I typically do some quick head math; but it is not hard math, so don't worry:
- 4hr - 2hr - 1hr - 30min - 15min - 8min - 4min - 2min - .1min - 30sec
- ISO50 - ISO100 - ISO200 - ISO400 - ISO800 - ISO1600 - ISO3200 - ISO6400 - ISO12,800 - ISO25,600
- Those are all one stop apart.
- If I do a 30sec exposure at ISO25,600 it will be just about the same as a 4hr exposure at ISO50. Do you see what I did?
- Think about everything in stops, so you can then play around to find the exposure you need without having to do crazy long exposures, as tests.
- This is an example of my high ISO test to get a proper exposure, and the two hour 'real' exposure is the shot at the top of this post.
- Your aperture should be set based on the needed depth of field (or hyperfocal) settings and how many stars you want to see, if you can't test the full spread you need with ISO you can also move the lens in full stop increments.
- Remember a 4 hour exposure to an 8 hour exposure is only one stop, so if you miss by an hour or two you might only miss by a half stop (or so)… not the end of the world with digital files.
- Honestly if you are going to miss, you should miss to the side of overexposure, one full stop is easy to save in post; but one stop under will not work as well for most situations/compositions.
- I really like two to three hour exposures (with wide angles); both because of how my camera handles it, and the resulting 30-45° arch that the circling stars make around Polaris. When I shoot more telephoto images (not at Polaris) I really like the one hour realm.
- I like to use flashlights to paint light in on my foreground subjects; but using foreground elements as simple silhouettes can be very cool too.
- Once you have this mastered try to shoot a foreground subject that is light by strobes, and then turn your focus to the stars and let the 1+ hour exposure continue to bring in your star trails. Note… It helps to cover your lens (blacked out) when changing your focus (trust me).
I believe in shooting the star trails in a single exposure; but you can also do lots of individual exposures and put them together with Achim Schaller's freeware StarTrails program, or Chris Schur's Star Trail Action inside of Photoshop to make a single image that is the equivalent of a single long exposure. One big plus is that you can avoid the issues that you run into with long exposure noise reduction; but some agencies, competitions, magazines, and art buyers do not accept multiple exposure composites, so the choice is yours. Most folks keep their short exposures under 10min; but well over the point that the stars actually blur/move.
February 21, 2011
Ask Dave, February 21st
I have decided to do a weekly blog post called 'Ask Dave.' I get tons of questions each week, and I always respond as quickly as possible; but I have decided that it is about time to also share the answers with all of you too. If you have questions you can email me at Learn@DaveShumway.com.
Question:
From Rick... I did not think that the 17-40/4.0L performed very well with a full frame image sensor. Many of your images indicate otherwise. I assume that most of your landscape shots are with the lens stopped down to f11 or more. Does that account for the apparent good image quality? Also how large of a print are you able to get using this camera/lens combination? What other wide angle lenses do you use with the 5DII?
Answer:
I love my 17-40/4.0L on the 5DII. I used the 16-35/2.8L; but found that it did not have what it takes, Canon agreed and made the new 16-35/2.8L II at it was quite an improvement; but the 17-40 is still better especially when it comes to landscape performance. Take a look at Canon's published MTF charts to see what I mean about the difference in image quality, contrast, and bokeh. Another benefit of the 17-40 is that it takes the same size Polarizer and ND filters as my 70-200/2.8L IS II and 400/5.6L, also it weighs less than the 16-35/2.8L II, while costing much less.
As with most lenses you do need to pull off your UV filter when shooting landscapes to keep flare and chromatic aberrations down.
I also use my 24/3.5L T/S II and it is, by far, the best quality wide angle lens I have ever used for shooting landscapes. The 24/1.4L II is also great; but not even in the same league. The Zeiss wide angle prime lenses are amazing too. The only real problem with primes is when you are backpacking/hiking/biking/skiing a light weight zoom is the only way to go.
As for my settings if you look through the gallery from my month in the Canadian Rockies you can view all of my camera settings. Just click on the blue 'photo information' button and you will see that I spend lots of time shooting landscapes from f/9.0-f/16 and up to f/22 from time to time. From my experience the lens is at its best around f/11-f/13 on a full frame sensor camera and f/9.0-f/11 on a cropped sensor camera.
Print size from the 5DII and 17-40/4.0L... Well, I have covered double decker busses with the combination, I have had two and three page spreads in magazines, and do quite a bit of printing at 16X20 & 20X30. With all of that I have yet to have any issues with a lack of resolution/quality. All of that said I am looking forward to 30-40MP sensors and using more tilt/shift lenses in the future. The reason? From my experience tilt/shift lenses are the only wide angle lenses that show no chromatic aberrations, they also give control over the convergence of parallel lines, and 30-40MP will let me make very large crop/panoramas.
I have also used the 24-70/2.8L and 24-105/4.0L IS; but never found them ideal as primary landscape lenses. I also use my 70-200s for landscapes often, the f/4.0L is amazing, as is the new f/2.8L IS II; but the previous f/2.8Ls never gave me the results I wanted. Heck I also use my 400/5.6L, 300/2.8L IS, and 500/4.0L IS to shoot landscapes on both full frame and cropped sensor cameras.
Question:
From Rick... I did not think that the 17-40/4.0L performed very well with a full frame image sensor. Many of your images indicate otherwise. I assume that most of your landscape shots are with the lens stopped down to f11 or more. Does that account for the apparent good image quality? Also how large of a print are you able to get using this camera/lens combination? What other wide angle lenses do you use with the 5DII?
Answer:
I love my 17-40/4.0L on the 5DII. I used the 16-35/2.8L; but found that it did not have what it takes, Canon agreed and made the new 16-35/2.8L II at it was quite an improvement; but the 17-40 is still better especially when it comes to landscape performance. Take a look at Canon's published MTF charts to see what I mean about the difference in image quality, contrast, and bokeh. Another benefit of the 17-40 is that it takes the same size Polarizer and ND filters as my 70-200/2.8L IS II and 400/5.6L, also it weighs less than the 16-35/2.8L II, while costing much less.
As with most lenses you do need to pull off your UV filter when shooting landscapes to keep flare and chromatic aberrations down.
I also use my 24/3.5L T/S II and it is, by far, the best quality wide angle lens I have ever used for shooting landscapes. The 24/1.4L II is also great; but not even in the same league. The Zeiss wide angle prime lenses are amazing too. The only real problem with primes is when you are backpacking/hiking/biking/skiing a light weight zoom is the only way to go.
As for my settings if you look through the gallery from my month in the Canadian Rockies you can view all of my camera settings. Just click on the blue 'photo information' button and you will see that I spend lots of time shooting landscapes from f/9.0-f/16 and up to f/22 from time to time. From my experience the lens is at its best around f/11-f/13 on a full frame sensor camera and f/9.0-f/11 on a cropped sensor camera.
Print size from the 5DII and 17-40/4.0L... Well, I have covered double decker busses with the combination, I have had two and three page spreads in magazines, and do quite a bit of printing at 16X20 & 20X30. With all of that I have yet to have any issues with a lack of resolution/quality. All of that said I am looking forward to 30-40MP sensors and using more tilt/shift lenses in the future. The reason? From my experience tilt/shift lenses are the only wide angle lenses that show no chromatic aberrations, they also give control over the convergence of parallel lines, and 30-40MP will let me make very large crop/panoramas.
I have also used the 24-70/2.8L and 24-105/4.0L IS; but never found them ideal as primary landscape lenses. I also use my 70-200s for landscapes often, the f/4.0L is amazing, as is the new f/2.8L IS II; but the previous f/2.8Ls never gave me the results I wanted. Heck I also use my 400/5.6L, 300/2.8L IS, and 500/4.0L IS to shoot landscapes on both full frame and cropped sensor cameras.
Labels:
17-40,
2011,
Ask Dave,
Camera,
Canadian Rockies,
Canon,
Dave Shumway,
f/4.0L,
Full Frame,
Landscapes,
Photography
January 13, 2011
Articles for ART347
I have decided that from time to time I am going to share links to articles that my ART347 students are required to read and discuss. My students will be blogging their thoughts and questions on their own blogs, that can be found here.
The first four articles are a series of articles on composition by Fine Art Landscape Photographer Alain Briot written for the Nature Photographers Network.
As the semester has just begun this first round is more of a refresher/warm-up for the class; but is still a good series of articles for us to all read and then examine our process' from time to time. "The Traditional Rules of Composition (part 1)" and "The Traditional Rules of Composition (part 2)" are both excellent examinations of the basic rules/types of composition and different ways to control composition, and by extension our images viewer. Most of what is written one should already know and follow, weather done consciously or not is another issue.
The second two articles relate more to composition in terms of its use in "Fine Art" or "Vernacular" photography. "Fine Art Composition" and "What Is A Snapshot" both examine composition as it relates to the respective type of photography.
I hope that you can take something away from these articles. If you have questions do not hesitate to write or call me, as I'll be happy to share my take and what the students in my ART347 course come up with.
The first four articles are a series of articles on composition by Fine Art Landscape Photographer Alain Briot written for the Nature Photographers Network.
As the semester has just begun this first round is more of a refresher/warm-up for the class; but is still a good series of articles for us to all read and then examine our process' from time to time. "The Traditional Rules of Composition (part 1)" and "The Traditional Rules of Composition (part 2)" are both excellent examinations of the basic rules/types of composition and different ways to control composition, and by extension our images viewer. Most of what is written one should already know and follow, weather done consciously or not is another issue.
The second two articles relate more to composition in terms of its use in "Fine Art" or "Vernacular" photography. "Fine Art Composition" and "What Is A Snapshot" both examine composition as it relates to the respective type of photography.
I hope that you can take something away from these articles. If you have questions do not hesitate to write or call me, as I'll be happy to share my take and what the students in my ART347 course come up with.
January 2, 2011
2010, 12 Months in Yellowstone
As the new year begins I look back on the blessings of the past year where, once again, I was able to make monthly trips to Yellowstone National Park. The images from all of my trips are online here, If you are having Yellowstone withdrawals I think my site is as good as any to get your fix.
January


February


March


April


April was a slow month; but it left me with a promise of good things to come.
May


June


July


August


September


October


November


December


Now I am not calling these "my best of 2010," they are simply a representative group of images from the Greater Yellowstone Ecosystem captured each month on 2010. I compiled these images while on vacation with a slow internet connection, so it is more of selecting the images that loaded fast and jumped out at me :)
I had a great year, I am thankful for all of you who follow me on my trips, I hope you enjoyed the images, and I wish us all happy shooting in 2011.
January
February
March
April
April was a slow month; but it left me with a promise of good things to come.
May
June
July
August
September
October
November
December
Now I am not calling these "my best of 2010," they are simply a representative group of images from the Greater Yellowstone Ecosystem captured each month on 2010. I compiled these images while on vacation with a slow internet connection, so it is more of selecting the images that loaded fast and jumped out at me :)
I had a great year, I am thankful for all of you who follow me on my trips, I hope you enjoyed the images, and I wish us all happy shooting in 2011.
Labels:
12 Months,
2010,
Dave Shumway,
National Park,
natural,
Nature,
photographs,
Photography,
wild,
Year in Review,
yellowstone
Subscribe to:
Posts (Atom)