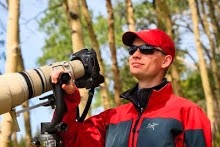
January 18, 2012
End of the Year in Yellowstone
Yellowstone, October 29 & 30, 2011
This trip was made with students from ART243 and ART247 photography courses. We had a good time, with plenty of learning (and that is why I take them to YNP), but the subjects were few and not completely cooperative. Other than landscape images of thermal features (Fountain Geyser erupted for us) most of my shooting was of birds (Bald Eagles, Tundra Swans, Trumpeter Swans, American Dippers, etc.)
Yellowstone, November 5 & 6, 2011
This trip, like the one before, was made with students from ART243 and ART247 photography courses. We had a really good time, with plenty of learning, and that is why I take them to YNP. The big difference between the last trip and this one is that we were able to find a number of cooperative subjects. We had the great fortune to be the only ones photographing a Red Fox around Tower (for about an hour), we had a friendly Coyote near Lower Geyser Basin, a pair of calm Bull Elk near dynamite curve, and we got another Fountain Geyser eruption.
Yellowstone, November 18 - 20, 2011
I had one student who was in both ART243 and ART247, but he could not make either of the previous trips, so the two of us made a trip to the park. Things were fairly slow, and there was almost as much snow then as there is in the park now. We did get to see an Ermine (run across the road), there were plenty of cooperative Mule Deer (buck and doe pairs), we found a few Coyotes, and the snow made for some nice landscapes.
Yellowstone, December 9 - 11, 2011
With classes finished and a three week trip to Chicago looming I decided to make a three day ski trip to the park. It was cold (-10) and there was plenty of snow (more then than now), but I had some new skis and plenty of ambition. I photographed the full lunar eclipse from above Blacktail Lakes, I photographed the Lamar Canyon Pack as they crossed the road in the Lamar Valley, I photographed an American Bald Eagle in a frosted tree, I spent time with a few Coyotes, spent plenty of time on my skis, and even more time in my tent. Did I mention that I took numerous photos of the full moon?
Yellowstone, January 7 & 8, 2012
After three weeks in Chicago I needed to return to Yellowstone, add in a full moon and there is little that can keep me from making a trip. Things were incredibly slow in the park, but I did end up with two good Wolf encounters. The first encounter was two black members of the Mollies Pack run directly below me along the Lamar River in the Lamar Canyon. The second was a Gray member of the Lamar Canyon Pack chasing a cow Elk near the road in the Lamar Valley. Beyond those encounters and a few shots of the moonrise/sunset I took virtually no other photographs.
Yellowstone, January 14 - 17, 2012
I just returned from this trip, but I have not finished editing photos yet. I did cut the 1602 images down to 331 very quickly. The trip was slow, but I found one or two things each day to photograph, and I made sure to snap lots of photos of everything I could. I have a feeling that I'll actually write a real blog post for this trip when I have the photos ready.
I am sorry for the delay, and for the rather brief report from each of these trips.
p.s. we had a good amount of snow to start off the year, but then much of that melted and we failed to receive any more snow, but as of today it is snowing, and the forecast is for it to stay at or below zero with heavy snow falling for the next few days, so here's to winter finally arriving in the mountains.
December 31, 2011
Best Images of 2011
Why does everyone do one of these year in review things? How can I go about choosing my top ten or twelve images from any given year?
Okay, fine, I'll try. I guess I make my students present 20 images at the end of each semester, so I'll do the same. There is no particular order to these selections, but I hope you enjoy the fruits of my "labor." I spent 52 days in Yellowstone National Park and another 70 days, or so, on other trips around North America.
All of the images can be clicked on to see a larger version within my site. I hope all of you have had a great holiday season, and are ready for a 2012 full of shooting.
Labels:
2011,
Best of,
Dave M. Shumway,
Dave Shumway,
December,
Fragile Places,
Images,
Nature,
Photo,
photographs,
Photography,
wild,
Wild Places,
Wildlife,
Year End,
Year in Review
November 26, 2011
Ask Dave, November 26
Ask Dave, November 26th
I get tons of questions each week, I respond as quickly as possible, and I might just answer them here too. If you have questions you can email me at <a href="mailto:Learn@DaveShumway.com">Learn@DaveShumway.com</a>.
Question:
Tony asked...
Why do you use an exposure bias?
Answer:
Often when working in rapidly changing light, with dynamic subjects, I (and many professional photographers) switch from manual to aperture priority mode (some will go to shutter priority mode, depending on the situation). When working with most modern cameras the photographer needs to be aware of what the camera is thinking when metering and suggesting an exposure for a scene, so they can step in and override the camera as needed.
On a basic level your camera wants everything that it meters to be 18% grey (see note). For most "normal" scenes that works well, but nature is full of black (100%) and white (0%). Think about a black bear or a tundra swan. A head shot of a black bear will tend to be overexposed as the camera thinks the black bear should be 18% grey. A similarly tight shot of a swan will be under exposed as the camera attempts to make the white swan 18% grey.
Some overcome this issue by using a middle/neutral grey exposure card (or something that is about 18% grey) with the camera's spot meter to dial/lock in a correct exposure for the scene. Others use high end light meters to know what the "true" setting should be, but neither of these methods work well in rapidly changing conditions with wild subjects. However I have and still use both of these methods in the studio.
Regardless of the shooting mode you should understand what your camera is trying to do, so you can override as needed, to get the correct exposure for the light at the moment your camera goes "click." This normally means taking countless photographs with your gear in many conditions, so that when the moment of truth comes you can set your camera correctly, with little to no thought.
Who cares, I shoot RAW?
That is a legitimate argument, but I strive to get my image as close to "perfect" at the moment of capture. Also adjusting exposure is a good way to increase the visibility of nose, and there are the situations where you miss by more than a stop (about what can be easily adjusted with a RAW file). There are also the times when over exposing a black bear could completely blows out the grass or snow in the background, or when shooting a landscape that missing the desired exposure dilutes the power of the color and most software has a difficult time recovering those lost elements.
NOTE:
If I recall, it was Ansel Adams that suggested 18% as middle/neutral grey and many followed suit. Ansel was speaking of reflected light not luminance, which happens to be what ANSI's standards are based on, they use a luminance of 12%. Oddly Sekonic uses a reflectance of 14% (they are the top handheld light meter manufacture). The difference between 12% and 18% grey is about 1/2 stop, but a luminance of 12% is typically going to measure a reflectance of 18%. I know it all seems a bit crazy, convoluted and pointless. If, like most, you use your camera in an evaluative metering mode that means the camera wants most of your scene to show a reflective light of around 18% grey (the last sentence is all that matters).
A few general exposure compensation tips to remember:
- Brightly lit snow is one and one-third to two stops brighter than medium/neutral gray;
- a bear or bison filling the frame is normally around one stop darker than medium/neutral gray;
- a white swan or pelican is normally around one stop brighter then medium/neutral gray;
- a raptor's dark underside against bright sky is normally around two to three stops too dark (your camera gets confused by the bright sky);
- dead grass of early spring and fall is very near white (0%) expose accordingly;
- When in doubt, check the histogram. Still in doubt, bracket. (heck always check the histogram)
Happy shooting
Subscribe to:
Posts (Atom)


